Machine Learning has gained popularity for good reasons, and many businesses are leveraging it to create innovative products. To stand out and ensure the success of your AI application, it’s crucial to follow specific steps and make informed choices.
This article will delve into the essential steps and options for building a successful AI application using Python and other relevant tools.
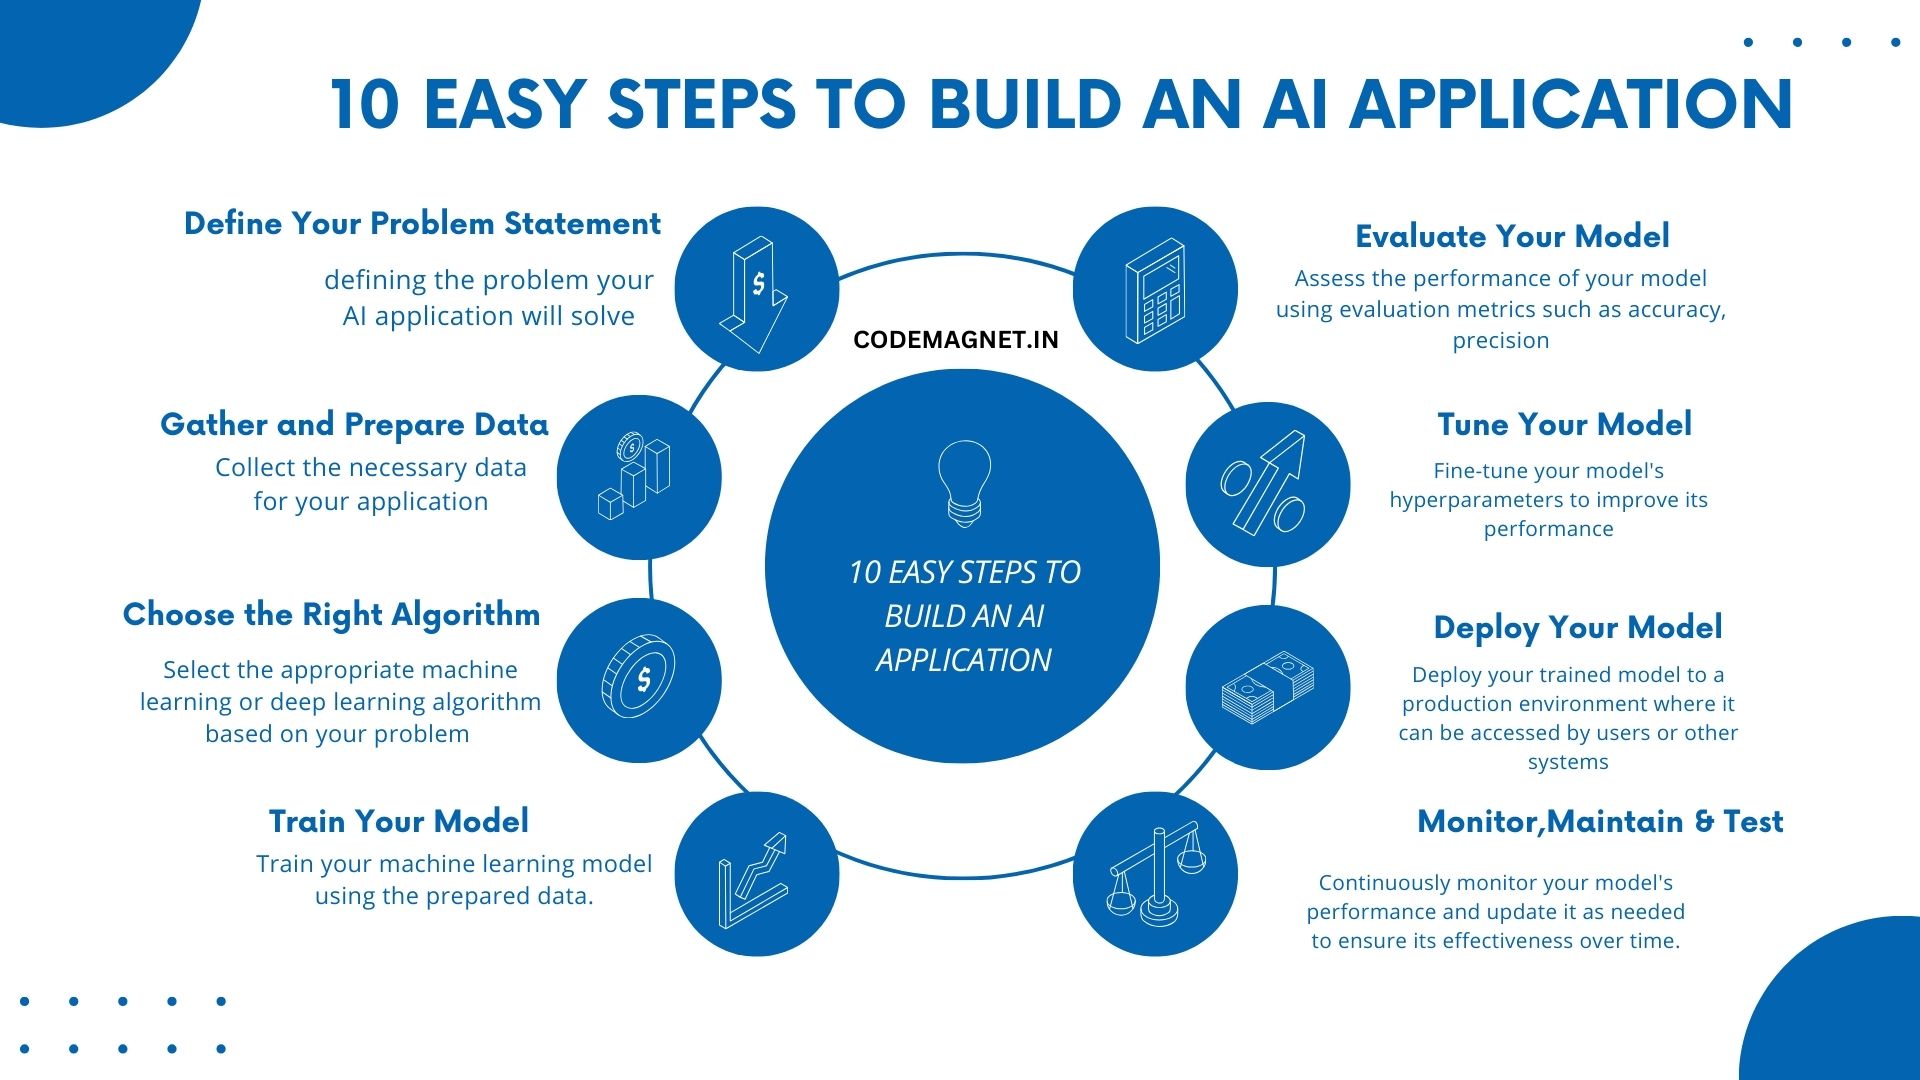
- Start by clearly defining the problem your AI application will solve. This will guide the rest of your development process.
- Collect the necessary data for your application. Clean and preprocess the data to ensure it’s ready for use in your AI model.
- Select the appropriate machine learning or deep learning algorithm based on your problem statement and data.
- Train your machine learning model using the prepared data.
- Evalutae your model
- Tune your model.
- Deploy
- Monitor and Maintian
- Thoroughly test your AI application to identify and fix any issues before deploying it to production.
- Iterate on your AI application based on user feedback and new data to continuously improve its performance and relevance.
let’s assume we have a predefined dataset containing information about students and their exam scores. We’ll use this dataset to train a machine learning model that predicts whether a student will pass or fail based on their study hours and attendance.
Here is a sample data set:
| Study Hours | Attendance | Result |
|---|---|---|
| 2 | 80 | Pass |
| 1 | 75 | Fail |
| 3 | 90 | Pass |
| 2.5 | 85 | Pass |
| 1.5 | 60 | Fail |
| 4 | 95 | Pass |
| 2 | 70 | Fail |
| 3.5 | 88 | Pass |
Now, let us start with the steps to create our AI model:
- Train your model
# Sample code for training the model
from sklearn.model_selection import train_test_split
from sklearn.ensemble import RandomForestClassifier
import pandas as pd

data = pd.DataFrame({
    'Study Hours': [2, 1, 3, 2.5, 1.5, 4, 2, 3.5],
    'Attendance': [80, 75, 90, 85, 60, 95, 70, 88],
    'Result': ['Pass', 'Fail', 'Pass', 'Pass', 'Fail', 'Pass', 'Fail', 'Pass']
})

X = data[['Study Hours', 'Attendance']]
y = data['Result']

X_train, X_test, y_train, y_test = train_test_split(X, y, test_size=0.2, random_state=42)
model = RandomForestClassifier()
model.fit(X_train, y_train)
2. Evaluate Your Model:
Assess the performance of your model using evaluation metrics such as accuracy, precision, recall, or F1 score.
# Sample code for evaluating the model
from sklearn.metrics import accuracy_score

y_pred = model.predict(X_test)
accuracy = accuracy_score(y_test, y_pred)
print(f'Accuracy: {accuracy}')
3. Tune Your Model:
Fine-tune your model’s hyperparameters to improve its performance.
# Sample code for hyperparameter tuning
from sklearn.model_selection import GridSearchCV

param_grid = {'n_estimators': [50, 100, 150]}
grid_search = GridSearchCV(model, param_grid, cv=3)
grid_search.fit(X_train, y_train)
best_model = grid_search.best_estimator_
4. Deploy Your Model:
Deploy your trained model to a production environment where it can be accessed by users or other systems.
# Sample code for model deployment
import joblib

joblib.dump(best_model, 'model.pkl')
Monitor and Maintain Your Model:
Continuously monitor your model’s performance and update it as needed to ensure its effectiveness over time.
Test Your Application:
Thoroughly test your AI application to identify and fix any issues before deploying it to production.
Iterate and Improve:
Iterate on your AI application based on user feedback and new data to continuously improve its performance and relevance.
By following these steps with the provided dataset, you can build a machine learning model that predicts student performance based on study hours and attendance.
Full Code:
import pandas as pd
from sklearn.model_selection import train_test_split, GridSearchCV
from sklearn.ensemble import RandomForestClassifier
from sklearn.metrics import accuracy_score
import joblib

# Sample data
data = pd.DataFrame({
    'Study Hours': [2, 1, 3, 2.5, 1.5, 4, 2, 3.5],
    'Attendance': [80, 75, 90, 85, 60, 95, 70, 88],
    'Result': ['Pass', 'Fail', 'Pass', 'Pass', 'Fail', 'Pass', 'Fail', 'Pass']
})

# Split data into features and target
X = data[['Study Hours', 'Attendance']]
y = data['Result']

# Split data into training and test sets
X_train, X_test, y_train, y_test = train_test_split(X, y, test_size=0.2, random_state=42)

# Train the model
model = RandomForestClassifier()
model.fit(X_train, y_train)

# Evaluate the model
y_pred = model.predict(X_test)
accuracy = accuracy_score(y_test, y_pred)
print(f'Accuracy: {accuracy}')

# Hyperparameter tuning
param_grid = {'n_estimators': [50, 100, 150]}
grid_search = GridSearchCV(model, param_grid, cv=3)
grid_search.fit(X_train, y_train)
best_model = grid_search.best_estimator_

# Save the best model
joblib.dump(best_model, 'model.pkl')
Output:

In the output if you see,
The AI model which we created gives an accuracy of 1.0, which means the model predicted all test samples correctly. However, the warning message indicates that one of the classes in the target variable y has only 2 members, which is less than the number of splits used in cross-validation (n_splits=3).
This warning suggests that the dataset which we have taken is imbalanced, meaning that some classes have significantly fewer samples than others. In such cases, the model’s performance metrics, especially for the minority class, may not be reliable. To sort this issue, you can consider techniques such as oversampling, undersampling, or using different evaluation metrics that are less sensitive to class imbalance, such as F1-score or ROC-AUC.
Explanation of the Full Code:
import pandas as pd: This line imports the pandas library and assigns it an aliaspd, which is commonly used for brevity when referring to pandas functions and objects.from sklearn.model_selection import train_test_split, GridSearchCV: This line imports specific functions (train_test_split,GridSearchCV) from themodel_selectionmodule of the scikit-learn library, which is used for machine learning tasks.from sklearn.ensemble import RandomForestClassifier: This line imports theRandomForestClassifierclass from theensemblemodule of scikit-learn, which is a machine learning algorithm used for classification tasks.from sklearn.metrics import accuracy_score: This line imports theaccuracy_scorefunction from themetricsmodule of scikit-learn, which is used to evaluate the accuracy of a classification model.import joblib: This line imports thejoblibmodule, which is used for saving and loading models in scikit-learn.data = pd.DataFrame({...}): This line creates a pandas DataFramedatawith three columns (‘Study Hours’, ‘Attendance’, ‘Result’) containing sample data for training the model.X = data[['Study Hours', 'Attendance']]: This line extracts the features (‘Study Hours’, ‘Attendance’) from the DataFramedataand assigns them to the variableX.y = data['Result']: This line extracts the target variable (‘Result’) from the DataFramedataand assigns it to the variabley.X_train, X_test, y_train, y_test = train_test_split(X, y, test_size=0.2, random_state=42): This line splits the dataset into training and testing sets (X_train,X_testfor features,y_train,y_testfor target) using thetrain_test_splitfunction. Thetest_size=0.2parameter specifies that 20% of the data should be used for testing, andrandom_state=42ensures reproducibility of the split.model = RandomForestClassifier(): This line creates an instance of theRandomForestClassifierclass, which represents the machine learning model we’ll use.model.fit(X_train, y_train): This line trains the model on the training data (X_train,y_train) using thefitmethod, where the model learns patterns in the data.y_pred = model.predict(X_test): This line uses the trained model to make predictions (y_pred) on the test data (X_test).accuracy = accuracy_score(y_test, y_pred): This line calculates the accuracy of the model’s predictions by comparing them to the actual labels (y_test) using theaccuracy_scorefunction.print(f'Accuracy: {accuracy}'): This line prints the accuracy of the model on the test data.param_grid = {'n_estimators': [50, 100, 150]}: This line defines a dictionaryparam_gridwith hyperparameters to tune. Here, we’re specifying different values for the number of trees in the random forest.grid_search = GridSearchCV(model, param_grid, cv=3): This line creates aGridSearchCVobjectgrid_searchthat performs a grid search with cross-validation (cv=3) to find the best hyperparameters for the model.grid_search.fit(X_train, y_train): This line fits theGridSearchCVobject to the training data, searching for the best hyperparameters.best_model = grid_search.best_estimator_: This line retrieves the best model found during the grid search, which has the best hyperparameters.joblib.dump(best_model, 'model.pkl'): This line saves the best model to a file named ‘model.pkl’ using thejoblib.dumpfunction. This allows us to later load the model and use it for making predictions on new data.
After finishing all the 10 steps listed above, it is time to be consistent and maintain your developed application.


Leave a Reply